Blog
How to Harvest and Cure Garlic for Long-Term Storage
Mid-July is prime garlic harvesting season! Learn exactly when to pull your garlic, how to cure it properly, and the best ways to store it for winter.
2026-07-14
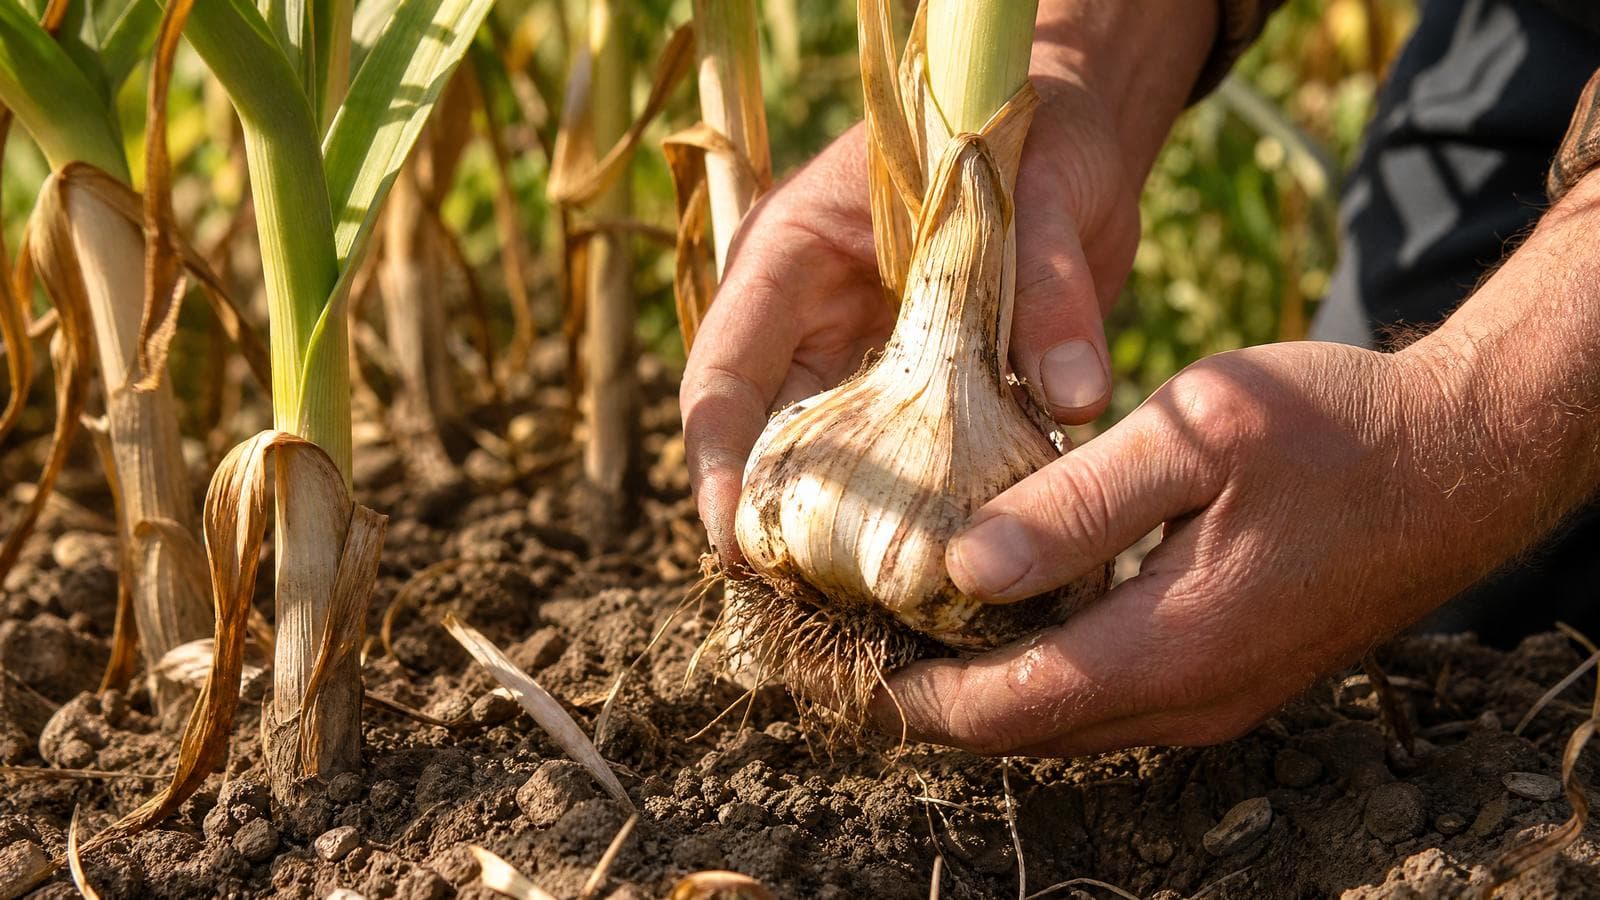
If you planted garlic last fall, the moment you've been waiting for is finally here. Mid-July is prime garlic harvesting season across much of the country.
But harvesting garlic isn't quite as simple as yanking it out of the ground. Pull it too early, and the bulbs will be tiny. Pull it too late, and the papery wrappers will split, causing the cloves to separate and rot in storage.
As a master gardener, I've lost my fair share of garlic to improper curing. Over the years, I've perfected the process. Here is everything you need to know to harvest, cure, and store your homegrown garlic so it lasts all winter long.
How to Know When Garlic is Ready to Harvest
Garlic doesn't give you a neon sign when it's ready, but it does give you a very clear signal if you know what to look for: the leaves.
Count the leaves on your garlic plant starting from the bottom up. As the bulb matures underground, the lowest leaves will begin to turn brown and die back.
The Golden Rule: Harvest when the bottom 3 to 4 leaves are completely brown and dead, but the top 4 to 5 leaves are still green.
Each green leaf represents one intact, papery wrapper around the bulb. You want enough wrappers to protect the garlic in storage, but if you wait until *all* the leaves are brown, those wrappers will have rotted away in the soil.
How to Harvest Garlic (Without Ruining It)
Do not pull the garlic by the stem! The stem will likely snap off, leaving the bulb stranded deep in the soil.
1. Stop watering: Stop watering your garlic patch about a week before you plan to harvest. This helps the soil dry out and begins the curing process.
2. Loosen the soil: Use a digging fork or a sturdy trowel like the Check Price on Amazon to gently loosen the soil several inches away from the base of the plant.
3. Lift gently: Once the soil is loose, gently lift the bulb out from underneath while lightly holding the stem.
4. Brush, don't wash: Gently brush off the loose dirt with your hands. Never wash the garlic! Getting the bulbs wet now will encourage mold and ruin the curing process.
How to Cure Garlic
Curing is simply the process of letting the garlic dry down so the energy in the leaves transfers to the bulb, and the papery wrappers shrink-wrap tightly around the cloves. This seals out moisture and bacteria.
1. Keep them intact: Do not cut off the roots or the stems yet.
2. Find the right spot: Move the garlic immediately out of the direct sun. Sunlight can actually cook the bulbs and alter the flavor. Find a dry, well-ventilated, shaded spot like a covered porch, an open barn, or a well-ventilated garage.
3. Provide airflow: Lay the garlic out in a single layer on wire racks, slotted shelves, or hang them in bunches of 5-10 from the rafters. Good airflow is critical. If your space is humid, set up a fan to keep the air moving.
4. Wait: Let the garlic cure for 2 to 4 weeks.
Trimming and Storing
You know the garlic is fully cured when the stems are completely brown and brittle, and the roots feel like stiff wire bristles.
At this point, use a sharp pair of pruners to trim the roots down to about 1/2 inch. Cut the stem off about 1 to 2 inches above the bulb. Gently brush off any remaining dirt, and you can peel off just the outermost layer of dirty paper if you want a clean, white bulb.
Store your cured garlic in a cool, dark, well-ventilated place. A mesh basket or a wire hanging basket works perfectly. Never store garlic in the refrigerator, as the cold temperature will trick it into sprouting!
If you're already thinking about next year's garlic crop, upload a photo of your garden to our Garden Designer to start planning your fall bed layouts!
***
*As an Amazon Associate I earn from qualifying purchases.*
***
Frequently Asked Questions
What is the difference between hardneck and softneck garlic?
Hardneck garlic produces a stiff central stalk (and a garlic scape in the spring) and generally has fewer, larger cloves. It is more cold-hardy. Softneck garlic has a pliable stem (perfect for braiding) and stores much longer than hardneck varieties.
Can I eat garlic straight out of the ground?
Yes! You don't *have* to cure garlic to eat it. Freshly dug "green garlic" is delicious, juicy, and slightly milder than cured garlic. However, it will only last a week or two in the fridge, so you must cure the rest of the harvest for long-term storage.
Why did my garlic bulbs split open in the ground?
Split bulbs usually mean the garlic was left in the ground too long. Once the protective papery wrappers rot away, the cloves separate. These are still perfectly fine to eat, but they will not store well. Use the split bulbs first!
Ready to Design?
Upload a photo of your space and get beautiful, personalized design ideas in seconds.
Keep reading
Seasonal planting reminders and expert guides — free.